Sharing large files and folders can be a headache, especially when dealing with limited storage space or online transfer restrictions. Enter the magic of ZIP files! This powerful tool allows you to effortlessly compress your data, making it smaller and easier to manage.
In the past, Mac users relied on third-party software for compression. Thankfully, macOS now comes equipped with a built-in “Archive Utility” that makes zipping a breeze. Whether you’re sending files via email, sharing them online, or simply trying to declutter your Mac, understanding how to use ZIP files can be a game-changer.
This comprehensive guide will equip you with the essential knowledge and skills to become a ZIP pro on Mac. We’ll explore everything from basic compression techniques to advanced features and third-party options. So, buckle up and prepare to unlock the world of efficient data management with ZIP files.
Also Check:
- How To Transfer File Between Iphone and Mac?
- How To Select Multiple Files On Mac
- See Download History on Google Play Store
What is a Zip File?
A ZIP file is a compressed archive format that combines multiple files and folders into a single, smaller package. Think of it like a vacuum-sealed bag for your digital files, significantly reducing their size without losing any data. This makes them ideal for:
- Sharing large files: ZIP files can drastically shrink your data, making them easier to send via email, upload to online platforms, or transfer through any medium.
- Saving storage space: ZIP files help you declutter your Mac and free up valuable storage space by compressing unused or infrequently accessed files.
- Organizing data: ZIP files can neatly organize your files and folders, making them easier to manage and navigate.
Overall, ZIP files offer a convenient and efficient way to manage your data on Mac, improving sharing, storage, and organization.
How to Zip Files and Folders on Mac?
Once you’ve learned how to create ZIP files, knowing how to extract their contents is equally important. This allows you to access your files and folders conveniently after they’ve been compressed. Here are three different methods to unzip files and folders on Mac:
1. Using Finder
The Finder offers a straightforward way to compress files and folders on your Mac. This method is ideal for beginners and anyone who prefers a quick and intuitive approach:
Here’s how to use the Finder to zip files/folders:
- Navigate to the files or folders you want to compress in your Finder window.
- You can select multiple items by holding down the Command key while clicking on each file or folder.
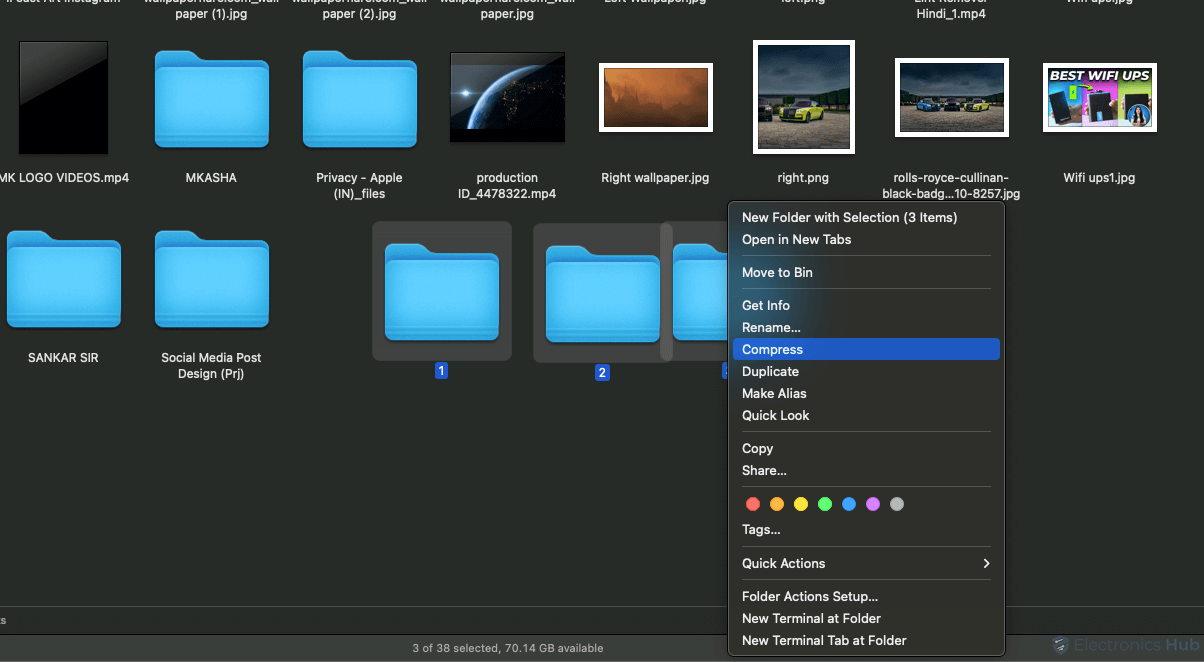
- Once you have selected the desired files/folders, perform a right-click (or Control-click) on any of them. This will display a context menu.
- In the context menu, locate and click on the “Compress” option.
- Then macOS will automatically begin compressing the selected files/folders. This process may take a few seconds depending on the size and number of files involved.
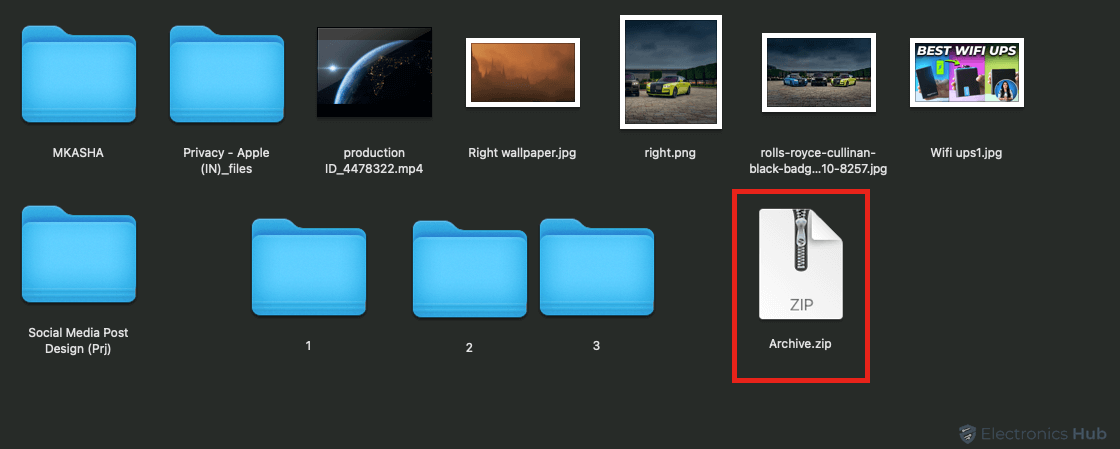
- Once the compression is complete, a new ZIP file named “Archive.zip” will be created in the same location as the original files/folders.
You can rename the ZIP file to a more descriptive name if desired. You can also move it to a different location using drag-and-drop.
2. Using the Archive Utility
The Archive Utility offers a powerful and flexible approach to compressing files and folders on your Mac. This method provides more control over the compression process and allows for additional features like password protection:
Here’s how to use the Archive Utility to zip files/folders:
- Open the Archive Utility, You can find it in the Applications folder or use Spotlight search.
- Locate the files or folders you want to compress and drag them directly onto the Archive Utility window.
- In the Archive Utility window, enter a desired name for the ZIP file in the “Save As” field. Choose the location where you want to save the compressed file using the “Where” dropdown menu.
- Click on the “Options” button to access advanced settings like compression level, encryption, and password protection. This Step is Optional
- Once you’re satisfied with the settings, click the “Create” button. The Archive Utility will begin compressing the files and folders into a ZIP file.
- The compressed file will be saved in the location you specified
How to Open Zip Files on Mac?
Accessing the contents of your ZIP files is incredibly easy on Mac. Here’s how to open them:
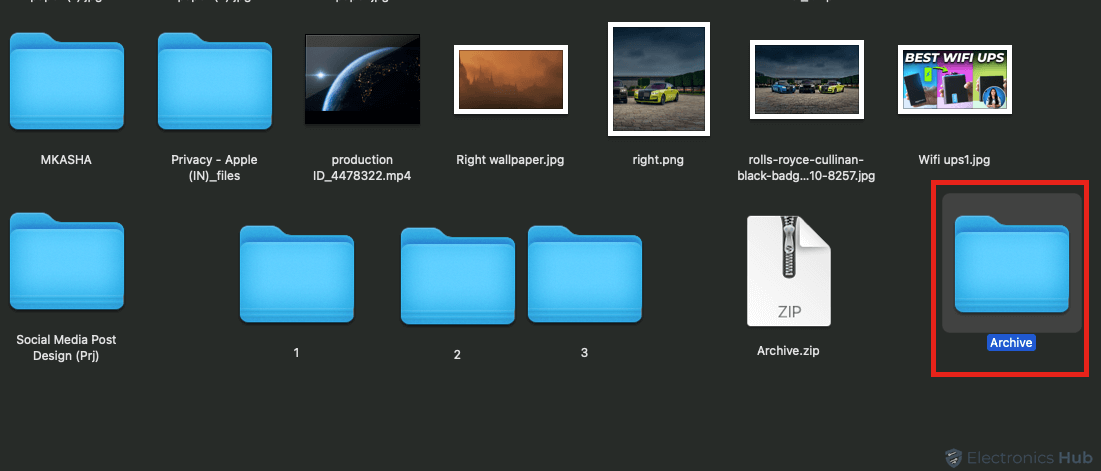
- Double-Click: Locate the ZIP file you want to open and double-click on it. macOS will automatically extract the contents to a new folder with the same name as the ZIP file, located in the same directory.
- Using the Archive Utility: Open the Archive Utility app. Drag and drop the ZIP file onto the window and choose “Extract” from the menu bar. Specify the location where you want to extract the files and click “Extract” again.
These simple steps make opening ZIP files on Mac a breeze, allowing you to access your compressed data quickly and efficiently.
Zip Files on Mac Using the Terminal
The Terminal offers a powerful way to manage ZIP files on your Mac, particularly for users comfortable with command-line interfaces. Here’s how to use the Terminal to zip files and folders:
- Open Terminal, You can access it through Applications/Utilities or Spotlight search.
- Use the “cd” command to navigate to the directory containing the files or folders you want to compress.
- Type the following command, replacing “archive_name.zip” with your desired ZIP file name and “files_and_folders_to_compress” with the names of the files/folders you want to compress. You can also simply drag, and drop it into the Terminal window:
zip archive_name.zip files_and_folders_to_compress.txt - Press the Enter key to execute the command.

- Extract a Zip File is also possible through the Terminal.
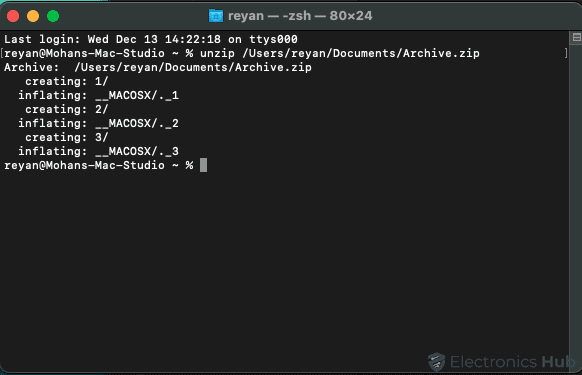
- To Extract The Zip File Through Terminal, type the following command in Terminal, replace “archive.zip” with File names you want to extract, You can also simply drag, and drop it into the Terminal window:
unzip archive.zip 
Using the Terminal requires familiarity with command-line syntax. If you’re new to the Terminal, consider using the Finder or Archive Utility for a more user-friendly experience.
Zip Files Using Third Party Software’s
While macOS offers built-in tools for managing ZIP files, third-party software can provide additional features and functionalities. These options cater to users who require advanced compression methods, password protection with strong algorithms, custom archive formats, and more.
- BetterZip: A powerful and feature-rich tool with advanced options like file splitting, encryption, and compression level customization. It also integrates with Finder and offers various automation options.
- The Unarchiver: A free and lightweight tool focusing on unarchiving various formats, including ZIP, RAR, and 7z. It also allows you to create ZIP and TAR archives.
- WinZip for Mac: A well-established tool with a familiar interface, offering features like splitting large ZIP files, creating self-extracting archives, and scheduling automated backups.
How Much Can you Save By Compressing?
The amount of space you can save by compressing files depends on several factors, including the file type, compression method, and original file size. Typically, you can expect to save anywhere from 30% to 90% of the original file size.
- Text files and documents: These files compress very well, often achieving savings of 50% to 90%.
- Images: JPEG files compress well, typically saving 10% to 50%. RAW and PNG images compress less effectively.
- Audio and video files: These files are already compressed and will not significantly reduce in size. However, certain formats like FLAC and MP3 can offer some compression savings.
These are just estimations, and the actual savings may be higher or lower depending on the specific file format and content. However, compressing your files can significantly reduce their size, making them easier to store, share, and transfer.
Compress Files and Folders on Mac – FAQs
Ans: To compress files and folders on Mac, select the items you want to compress, right-click, and choose “Compress [your selection].” Alternatively, you can select the items and go to the “File” menu, then choose “Compress [your selection].”
Ans: Double-click the zip file, and macOS will automatically extract its contents into the same location. Alternatively, you can right-click on the zip file and choose “Open With” > “Archive Utility” for manual extraction.
Ans: macOS supports various compression formats like gzip, tar, and more. You can use Terminal commands for these formats based on your needs.
Ans: Yes, you can create a split Zip archive on Mac. While compressing files, choose the “Options” button and select “Split” to define a size for each part of the split archive.
Ans: Yes, there are third-party applications like “The Unarchiver” and “Keka” that provide additional features and format support for compressing and decompressing files on Mac.
Conclusion
ZIP files are a powerful tool for anyone who wants to save storage space, easily share files, and efficiently organize their data on Mac. Understanding how to create, open, and manage ZIP files is a valuable skill that can benefit users of all levels.
Whether you’re a beginner or a seasoned Mac user, this guide provides you with the knowledge and resources you need to become a ZIP pro. By mastering these techniques, you can unlock the potential of ZIP files and improve your data management experience on Mac.
