A Car battery is a very crucial component for all types of cars. The car battery is responsible for providing current to the spark plug to generate preliminary sparks and start the engine. The battery also provides current to the intake and exhaust valves so that they are operated at the perfect timing. Failing that, the engine would stop immediately. And once the car battery is discharged, you won’t have any other option than replacing the battery or jump-starting it from another charged battery.
Fortunately, such scenarios can be easily avoided if you perform routine maintenance on your car battery. One of the most important parts of this maintenance procedure is to clean the battery completely. It also means cleaning negative and positive battery terminals which supply the current to your car.
In today’s guide, we will thoroughly discuss the necessity of cleaning a car battery as well as guide you on how you can perform the task easily. We will also cover step-by-step instructions on what you need beforehand so make sure you don’t miss that out.
Why Should You Clean Your Car Battery?
Before we discuss the procedure to clean your car battery, let us try to understand the importance of doing so. As you may already know, the car battery, or any kind of portable battery for that matter, contains acid which might start leaking after a couple of years of usage.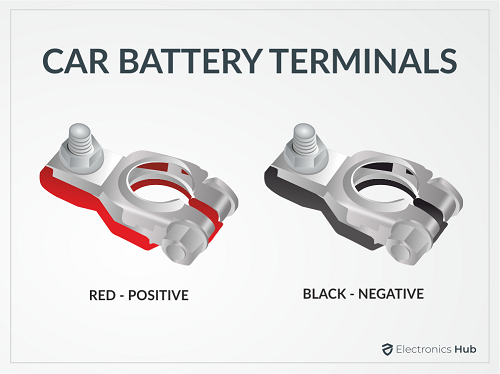
This leakage will start the deposition of a layer of hazardous material on the battery which might be harmful to the battery as well as for your own safety.
Even if there is no leakage, there is always a deposition of dust and dirt on the terminals that hinders the flow of electric current which ultimately decreases the overall performance of the battery. The improper flow of current might also damage the internal components of your car such as the audio system or the lights.
And if the battery terminals come in contact with moisture, it will start to corrode, making it even harder to maintain a uniform flow of electric current.
To avoid all of that, you need to carefully check the health of your battery at regular intervals. With simple visual observation, you can check whether this is leakage on the battery or corrosion which can create problems in the future. If you detect such problems with your battery, you need to clean the unit as soon as possible.
However, it is quite easy to do so and you can do it yourself without needing any professional help. If you are planning to clean your battery, make sure you follow our guide until the end.
What Do You Need To Clean Your Car Battery?
Now that you know the importance of cleaning a car battery, let’s get on with the list of things you need to get the job done. There are a lot of ways to clean the battery completely like vacuuming, washing, waxing, and many others.
But even if you don’t have the apparatus to perform these tasks, you can even try getting the battery clean with simple household items. For simple battery terminal cleaning, you can use basic items and get the job done with ease.
In our guide, we will tell you how to clean the battery and its terminals using simple items such as:
- Protective gloves, similar to dishwashing gloves
- Baking soda
- Ample flow of water
- Scrubbing brush. An old toothbrush might also get the job done
- Cleaning cloth. Prefer a thick cloth to dry the battery properly
- Petroleum jelly for anti-corrosive coating
And that’s pretty much it. With these easily accessible household items, you will be able to get your battery completely clean and as good as new. And for the cleaning solution, all you have to do is prepare a simple mixture of baking soda and water.
This simple mixture is capable of performing a thorough cleaning session and will clear out all residue dust and dirt as well as corrosion from your battery terminals.
How To Clean The Car Battery?
Now that you are ready with all the things you need, let’s get started with the cleaning process. By following the simple process mentioned here, you can perform an easy cleaning session and avoid any trouble with the battery later on. However, make sure you follow each and every step carefully so that you can safely clean the battery terminals.
Step #1. Assess The Condition of The Battery
Before you clean the battery, the first thing you need to check is whether your battery needs cleaning or not. If your battery is rather new or freshly installed, it is possible that your battery won’t have a lot of dust and you won’t have to thoroughly clean the unit. On the other hand, if your car battery is untouched for a couple of months or a year, you should definitely clean the battery.
In order to assess the condition of the battery, you don’t need to remove it completely from the car. The only area that you need to check is the area around the battery terminals. Simply check this area and make sure there is no corrosion or dust deposition near the terminals. You can also check if there is residue acid near the terminals or on the lower portion of the battery which might indicate leakage problems.
Step #2. Check If the Terminals Are Corroded
As you may already know, corrosion is one of the most severe problems which hinders the performance of electrical appliances. Corrosion can take place on any metallic area of the battery such as the terminals, body, casing, or even the cables. Once you lift up the plastic covers, you can easily check if there is corrosion deposition near the terminals. Unlike regular metallic corrosion, the corrosion deposition on battery terminals appears white in color.
You might also find ash-colored deposition based on your battery type or surrounding environment. If the damage is beyond cleaning, you might have to consider a replacement for cables altogether. However, minimal corrosion can be easily cleaned with baking powder and water solution.
Step #3. Disconnect The Battery from Car
If you feel that the battery needs cleaning after a thorough inspection, you should start the cleaning procedure. First of all, you need to safely disconnect the battery from the car. While doing so, make sure you disconnect the negative terminal first.
You might need to use a wrench to loosen the grip over the terminals before you can remove them safely. Once the negative clamp is completely removed, start working with the positive clamp. Once you loosen the nut on the positive clamp, you can remove it as well.
Make sure you don’t accidentally touch the tool with any metallic part such as the frame of the car. Doing so will result in a short circuit which might be hazardous for you. If there is a heavy layer of corrosion on the nuts, it might get a little difficult to loosen them and remove the terminal connections.
Step #4. Prepare A Cleaning Agent
If you haven’t prepared the cleaning solution yet, now is the right time to do it. As we are using just baking soda and water, you can easily prepare the solution within a few minutes. However, make sure you use the appropriate amount of baking soda to prepare the right mixture.
Generally, 2 to 3 tablespoons of baking soda mixed with 15 to 20 ml of water work perfectly. Once you have poured the mixture, start stirring it with a spoon until it becomes a thick paste. Make sure that the baking soda is completely dissolved in the water before you use it.
Step #5. Clear The Corrosion Deposit
Once you have the solution ready, you can start cleaning the car terminals. As baking soda is an alkaline product, it reacts with the corrosion or oxidation deposit and neutralizes it. This easily removes the layer of corrosion from any metallic surface. The solution even works out for corrosion caused by leakage of battery acid.
To clear the corrosion from terminals, simply dip the scrubbing brush into the paste and start brushing the corroded area of the battery. If you are using a toothbrush, you can easily reach the corners and compact space between the wires and terminals.
Once you start brushing the paste, you can see bubbles forming around the corroded area which indicates the solution is doing its job. After you have applied the paste properly to the corroded area, leave it for 10 to 15 minutes.
If you feel like the corrosion is not getting loose with just the brush, you can use a blunt but harder object to scrape off the corrosion layer. Generally, a simple butter knife can get the job done. Just make sure you don’t end up with the same butter knife in your kitchen again.
Step #6. Rinse The Battery With Water
Once the baking soda and water paste stop foaming, you can start cleaning it. While you are cleaning the paste, you will also notice the corrosion and dust formations getting washed away alongside the foam. To properly clean the paste, you will need about 2 cups of water.
Simply pour the water over the terminals slowly to wash off the paste. If you have accidentally created a thicker paste, you might have to use more water. In such a case, simply wipe off the excess paste with a moist cloth before you rinse the battery.
Step #7. Clean The Terminals
Now comes the most crucial part of cleaning the terminals. Even though most of the corrosion and dust deposition is gone, the battery is not ready to be in service yet. You need to carefully clean the terminals and make sure that they are completely dry before you reconnect them.
For that, take a separate dry cloth and wipe off the terminals a couple of times. Performing the procedure under direct sunlight also helps to make the terminals dry a bit faster. Or, you can use a hairdryer from a safe distance and use the warm air to dry the terminals.
Step #8. Use Petroleum Jelly To Apply Protective Coating
Now that the terminals are completely dry, you can reconnect the battery to your car. However, you can apply an anti-corrosive coating on the terminals to delay the next cleaning sessions. Special anti-corrosive solutions might be too much for a simple car battery. But, if you have petroleum jelly, you can use that to secure the terminals.
Simply get some jelly on the glove fingers and apply them all around the terminals. As the terminals are pretty clean now, you can easily apply the jelly without much of an issue. This will prevent the corrosion problem for a very long time.
Step #9. Reconnect The Battery
Now that the battery is cleaned and safe against corrosion, you can reconnect the battery safely. While you are reattaching the clamp, be mindful of the same precautions as removing the clamps. You will have to attach the positive clamp first. Once you attach the clamp to the positive battery terminal, secure it with the nut.
Tighten the nut with the help of a wrench. Once you have properly attached the first clamp, move onto the negative one and do the same. Make sure you check both of the clamps are tightened perfectly before closing the lid.
Conclusion
Cleaning a car battery is a pretty simple task and the majority of car owners can get it done without needing any professional help. In our guide, you will find all the necessary information you need to know before cleaning your car battery terminals along with a detailed procedure for the same.
All you need to do is follow the steps mentioned here carefully and you will be done in no time. If you are not sure about any of the topics covered in our guide today, you can reach us via the comment section and we will get back to you right away.
