Windows is the perfect operating system for multitasking. However, opening multiple applications on full screen and switching between them hamper productivity when you are multitasking. Windows let you resize the windows of different applications and have multiple applications open on the same screen. But resizing the windows to fit the screen is also time-consuming, especially when you are closing an existing application window and replacing it with the new one.
To address the issue and automate the process, Windows 10 has come up with a split-screen feature whereby you can open multiple windows of different applications on the same screen instantly. You can also customize the area of the screen to have multiple applications depending on your screen size. Here are all the different ways to split screen on Windows 10.
1. Snap Assist
Snap Assist is a tool available on Windows 10 that helps you to automatically resize windows to fit the screen side by side perfectly. All you have to do is drag the open windows to the sides or corners and Snap Assist will automatically do the resizing work.
Here are the steps to enable Snap Assist on Windows 10 –
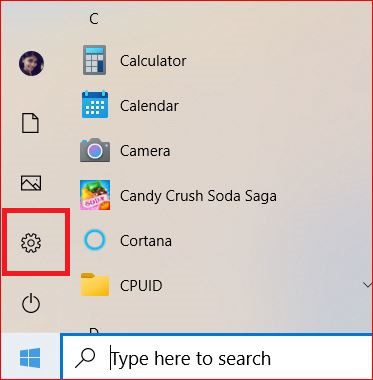
Step 1: Click on Start button.
Step 2: Search for Settings and open it.
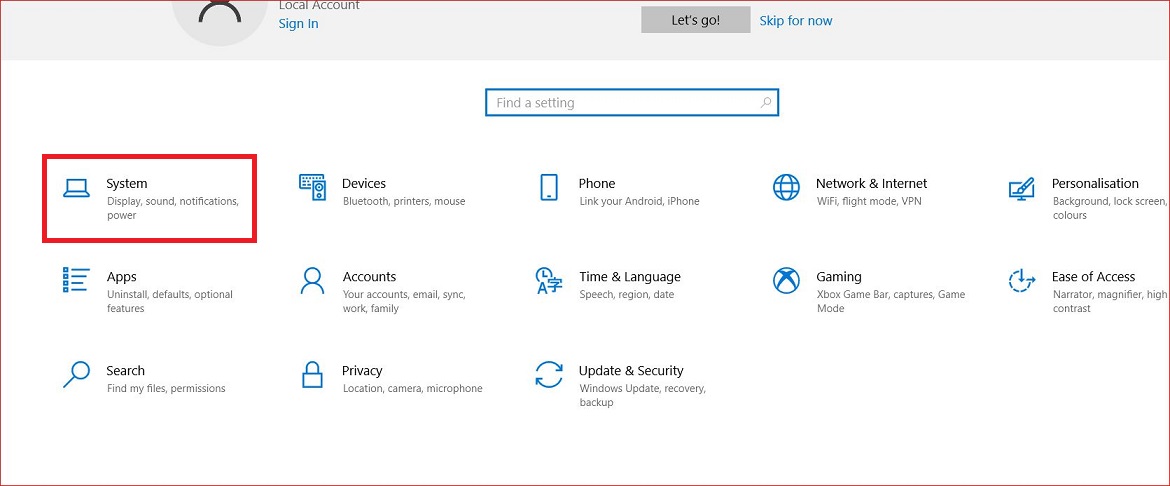
Step 3: Once Settings window opens, click on System.
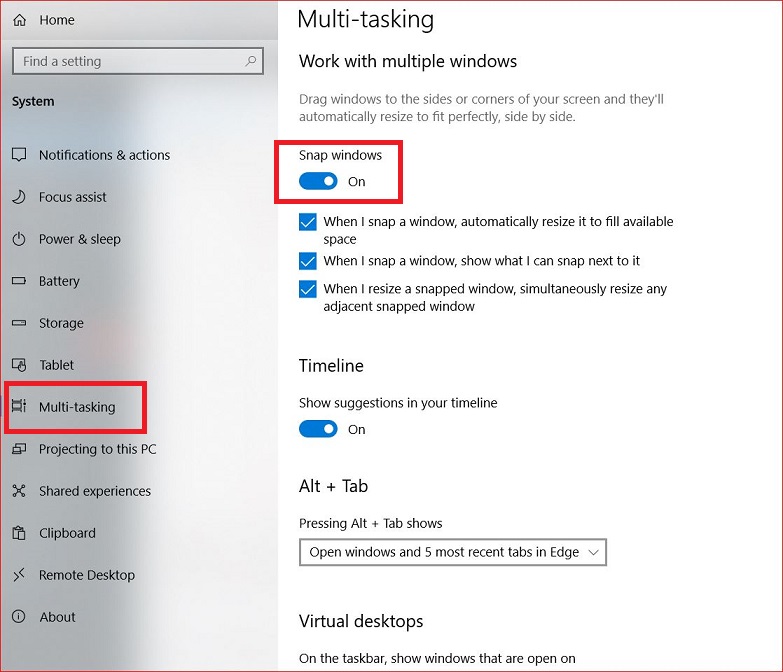
Step 4: Go to Multitasking from the left menu.
Step 5: Toggle on Snap Windows.
You can also turn on or off the options available regarding how Snap Assist will resize when you snap a window.
Here are the Steps to use Snap Assist for Splitting Screen –
Step 1: Open the application window that you want to snap to one-half side of the screen.
Step 2: Click and drag the window to the edge of the screen.
Step 3: A translucent outline will appear showing the area where the window will be resized. Generally, the outline will show that the window will occupy 25% of the screen on one side.
You can drag the window slightly down for the outline to occupy half of the screen. Similarly, you can drag the window slightly outward of the edge if you want it to occupy the full screen.
Step 4: Once you are happy with the outline, leave the window to get resized automatically as per the outline.
Step 5: If you have another application window open when you snap the first window, you will see various options to fill the other half of the screen with the other window. Click on the one that you prefer, and all the other open windows will get resized and arranged accordingly.
You can resize the windows by hovering the mouse pointer on the dividing line, and it will become a two-arrow pointer. Click and hold the line and drag the line to resize the windows as per your requirements.
2. Use the Keyboard Shortcut
If you think the above-mentioned steps on enabling and using Snap Assist is too lengthy, Windows 10 has keyboard shortcuts to make things faster for you. Here are the steps to follow –
Step 1: Open the window which you want to snap automatically.
Step 2: Press Windows key and use Left or Right arrow key. Accordingly, the window will snap to the left or right half side of the screen.
Step 3: Open another window that you want to snap to the remaining empty space using the same key combination as in Step 2.
Step 4: If you want to resize any window to full screen, press Window and Up arrow key together.
3. Snapping More Than Two Windows
If you have a large screen, you can easily place more than two windows on one screen with clear visibility. Here are the steps to follow –
Step 1: Open the first window and drag it to the edge of the screen at any corner and leave. This will make the window occupy 25% of the screen at that corner.
Step 2: Open another window and repeat the previous step.
Step 3: Similarly, open the other two windows and drag them to the empty corners.
In the above steps, we have snapped four windows and each occupying 25% of the screen on all four corners. If you have three windows, you can make one to occupy 50%, and the other two windows take 25% respectively.
4. Turning off Snap Assist
If you want to turn on Snap Assist on Windows 10 because you want to resize windows manually and Snap Assist is getting in your way, here are the steps to follow –
Step 1: Click on Start button.
Step 2: Search for Settings and open it.
Step 3: Once Settings window opens, click on System.
Step 4: Go to Multitasking from the left menu.
Step 5: Toggle off Snap Windows.

Instead of turning off Snap Windows option completely, you can uncheck the individual options available regarding Windows snapping as per your preference.
5. Customize Grids using a Third-Party App
If you want more customizable options for resizing windows regularly so that you can do multitasking comfortably, you have to take the help of a third-party app. There are various third-party apps that provide you with grid-like structure to resize windows perfectly as per your requirements. We recommend you install AquaSnap app.
AquaSnap app allows you to resize and adjust as many windows as you need. It is very much like Snap Assist, except it is more flexible and full of customizable options. The app is available free, but there is a premium version also available. The premium version is the best, with additional features like transparent windows, window stretching, and windows docking.
Conclusion
We have provided you with all the information on how to enable and use Snap Assist to split screen on Windows 10 for multitasking and enhancing productivity. If you think that Snap Assist is not enough and you want more customizable options, you can disable Snap Assist and opt for a premium third-party app to fulfill your requirements.
