In this project, I will show you How to Make a Smart Dustbin using Arduino, where the lid of the dustbin will automatically open when you approach with trash. The other important components used to make this Smart Dustbin are an HC-04 Ultrasonic Sensor and an SG90 TowerPro Servo Motor.
Introduction
Dustbins (or Garbage bins, Trash Cans, whatever you call them) are small plastic (or metal) containers that are used to store trash (or waste) on a temporary basis. They are often used in homes, offices, streets, parks etc. to collect the waste.
In some places, littering is a serious offence and hence Public Waste Containers are the only way to dispose small waste.
Usually, it is a common practice to use separate bins for collecting wet or dry, recyclable or non-recyclable waste.
In this project, I have designed a simple system called Smart Dustbin using Arduino, Ultrasonic Sensor and Servo Motor, where the lid of the dustbin will automatically open itself upon detection of human hand.
Concept behind Smart Dustbin using Arduino
The main concept behind the Smart Dustbin using Arduino project is Object Detection. I have already used Ultrasonic Sensor in Object Avoiding Robot, where upon detecting an object, the Robot will change its course of direction.
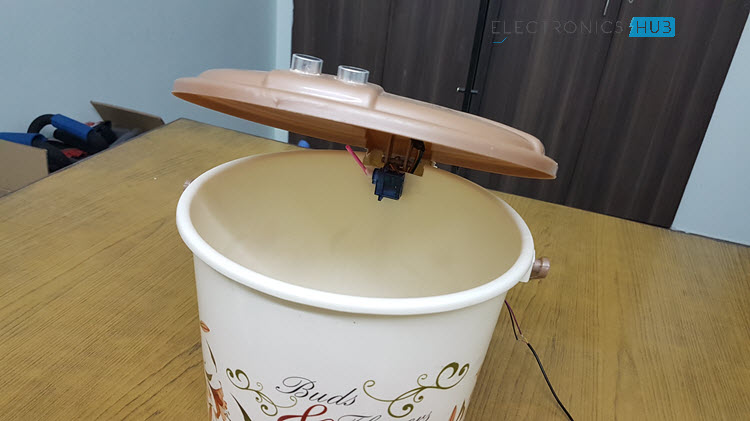
A similar methodology is implemented here, where the Ultrasonic Sensor is placed on top of the dustbin’s lid and when the sensor detects any object like a human hand, it will trigger Arduino to open the lid.
How to Build a Smart Dustbin using Arduino?
Connecting the Servo
Now, let me take you through the actual setup and build process of the Smart Dustbin using Arduino. First, I will start with the mechanism to open the lid. As you might have already guessed, I have used a Servo Motor for this purpose.
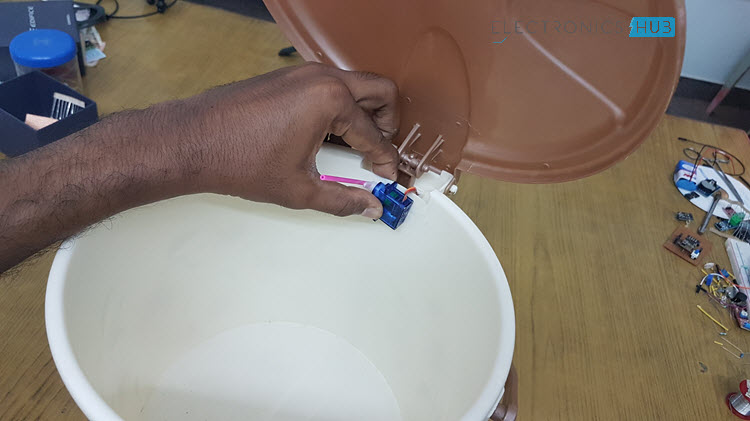
In order to open the lid, I have fixed a small plastic tube (like an empty refill of a ball-point pen) to the servo horn (a single ended horn) using instant glue.

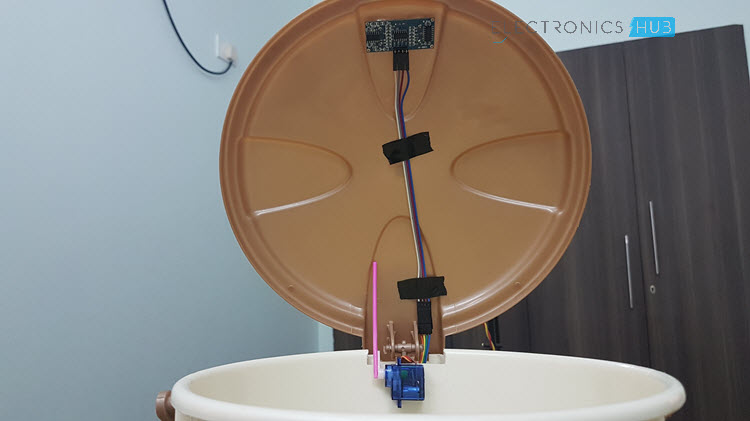
For this mechanism to be able to open the lid of the dustbin, it must be placed near the hinge where the lid is connected to the main can. From the following image, you can see that I have fixed the servo motor on the can.
Also, make sure that the lifting arm is parallel to ground under closed lid condition.
NOTE: According to the Laws of Physics, you will require more energy to push the lid from the hinge than at the extreme end. But in order to open the lid and not have any obstacle, this is the only place to fix the servo motor with its arm.
Connecting the Ultrasonic Sensor
Once the servo is in position, you can move onto the Ultrasonic Sensor. Make two holes corresponding to the Ultrasonic Sensor on the lid of the dustbin, as shown in the following image.
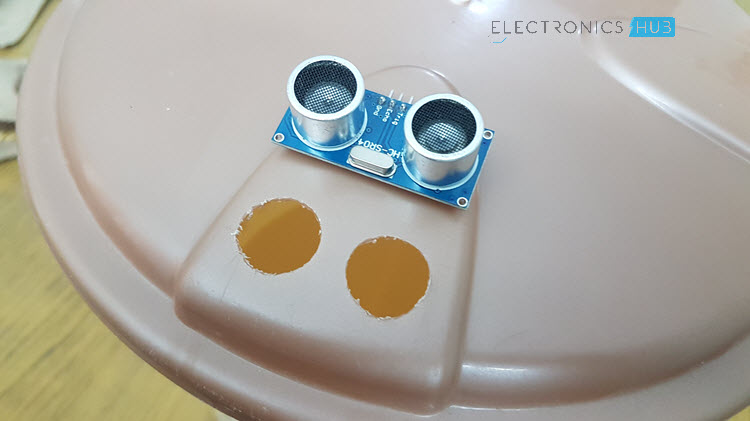
WARNING: You have to use a sharp object with a lot of force to make these holes. Be careful.
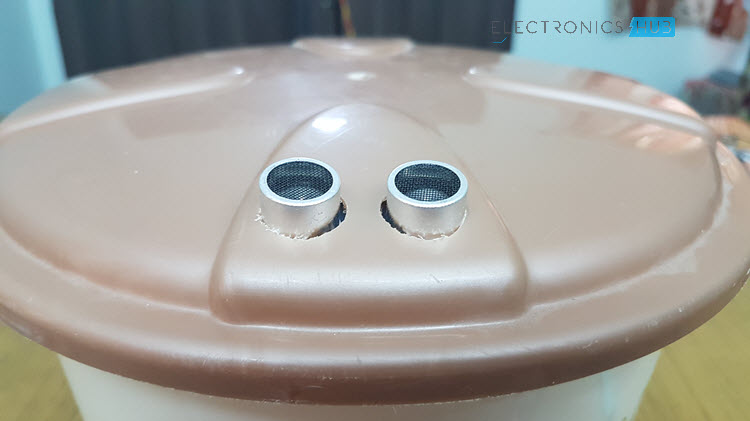
Now, from the inside, place the Ultrasonic Sensor through the holes and fix its position with the help of glue.
Wiring up the Components
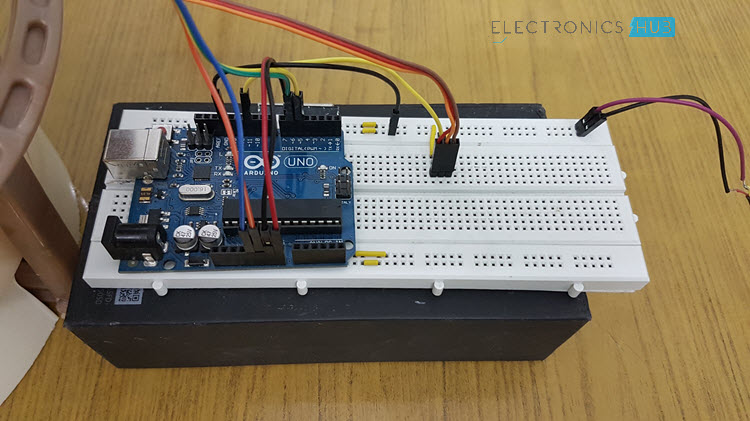
The final step in the build process is to make the necessary connections using long connecting wires as per the circuit diagram and securing these wires so that they don’t hang around.
All the wires from both the components i.e. Ultrasonic Sensor and Servo Motor are connected to respective pins of Arduino. This finishes up the build process of the Smart Dustbin.
Circuit Diagram
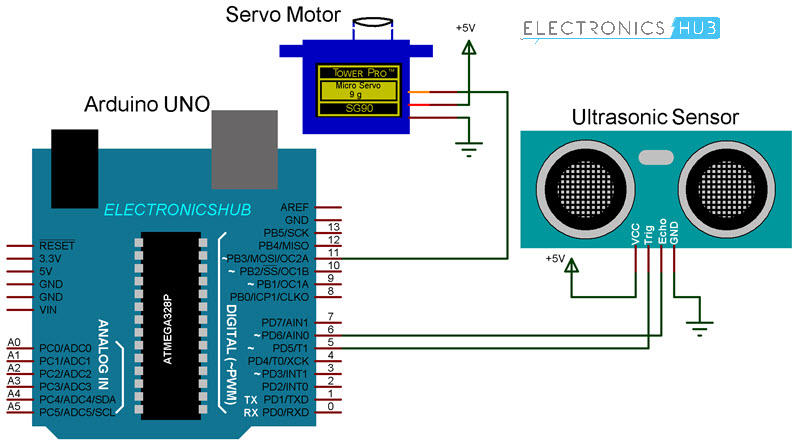
The following image shows the circuit diagram of the Smart Dustbin using Arduino. It is a very simple design as the project involves only two components other than Arduino.
Components Required
- Arduino UNO [Buy Here]
- HC-SR04 Ultrasonic Sensor Module
- TowerPro SG90 Servo Motor
- Connecting Wires
- 5V Power Supply
- A small dustbin with hinged lid
- Miscellaneous (glue, plastic tube, etc.)
Code
The code for the project How to Smart Dustbin using Arduino is given below.
Working
After setting up the Smart Dustbin and making all the necessary connections, upload the code to Arduino and provide 5V power supply to the circuit. Once the system is powered ON, Arduino keeps monitoring for any object near the Ultrasonic Sensor.
If the Ultrasonic Sensor detects any object like a hand for example, Arduino calculates its distance and if it less than a certain predefined value, Arduino will activate the Servo Motor and with the support of the extended arm, it will list the lid open.
After certain time, the lid is automatically closed.
Output Video
https://youtu.be/RHW-2JDuq90
Conclusion
A simple but useful project called Smart Dustbin using Arduino is designed and developed here. Using this project, the lid of the dustbin stays closed, so that waste is not exposed (to avoid flies and mosquitos) and when you want dispose any waste, it will automatically open the lid.

10 Responses
ts a good project indeed, i made mine but i add another ultrasonic sensor for detecting level of trash, so i need your help on the code part because it is not sensing the trash level
Im doing the same project and im having a hard time programing cause i suck at it
Can you send me the code of the oppener and the trash sensor level ?
Bro its great , well done ,
Where is the code
Where is the code??
Sir I need to order this dustbin. Is it available in any website or can you help me how I can order this.
Please am a student and I want to use it as my final project so I need more information about the construction
I am computer science student i want to make this smart dustbin for my project
I have to create smart dustbin which automatically open and display when it’s full and give notification in mobile
I am new to this
Can you please help me
Nice work. I would love to do this for my final year project. I need more information especially the code.
Great work. Using it for project in my club!! Just beautiful!