In Minecraft, everything is made up of pixelated blocks. This definitely reduces the number of polygons needed to create an object in a game, making it a lot easier to render. And because of that, the devs were capable of creating a never-ending world in Minecraft.
However, do not consider Minecraft too easy on your system. Even though it is quite a simple game, it usually creates a lot of load on entry-level and mid-range gaming computers, especially on the RAM. And with continuous updates and new stuff being added to the game, the requirements for the game are higher than ever.
If you are facing problems like stuttering or lagging after a recent update in Minecraft, it can be because of insufficient RAM capacity. It is rather easy to fix this problem as you can simply allot more RAM to the game. Today, we will go over the same in our guide and let you know different methods to allocate more RAM to Minecraft.
How Much RAM is Needed for Minecraft?
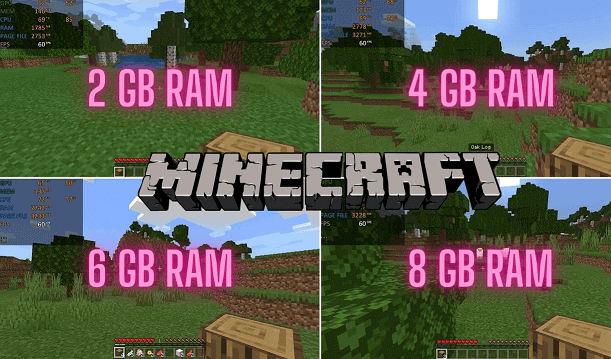
Before we talk about how to allocate more RAM to Minecraft, let us try to understand how much RAM is actually required to play the game fluently. The RAM requirement for Minecraft changes depending upon what mode you are playing and the type of your installation. If you are playing Minecraft without any mods and external plugins, it should run fine even with 2 GB of RAM.
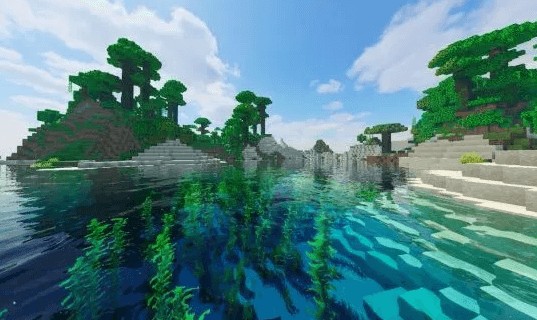
However, things change drastically when you introduce mods to the game. The mods are mostly designed to make the game look better which greatly impacts the performance of the game. Therefore, you might be needing anywhere between 4 to 8 GB of RAM depending upon the type and number of mods you are installing on your game.
Even if your computer has sufficient RAM capacity to run the game smoothly, it won’t always be the case. You will have to check the RAM capacity allocated for Minecraft and see if that is sufficient for your installation. If the allocated RAM capacity for your Minecraft installation is only 2 GB, you won’t get the best performance even if you have 32 GB of fastest RAM modules powering your computer.
Fortunately, it is possible to check and allocate more RAM for Minecraft. Stick until the end of our guide where we will tell you how to do that by following a few simple steps.
How To Check Your RAM?
Before you can tweak the RAM allocation settings for Minecraft, you must know how much RAM you have in your computer. It is impossible to allocate more RAM to your game than what you actually have installed in your system. But don’t worry as checking the RAM capacity is pretty easy, especially on Windows computers.
Here’s how you can check the RAM capacity on your computer:
- Press the “Windows Key + X” key combination to open Windows settings.
- Here, you will find various categories. Check for the “Systems” category which should be the first option in the window.
- Now, click on the “About” option present at the bottom of the list present at the left section of the window.
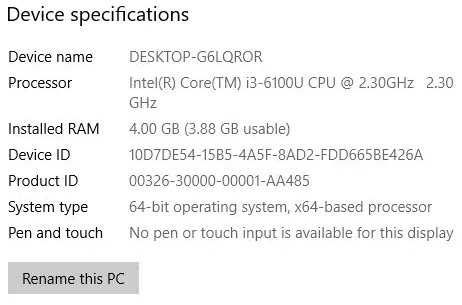
- Here, you will find all information related to your computer as well as Windows OS.
- At the top, there will be a section called “Device specifications” which will show you installed RAM capacity.
If you wish to know how much RAM you can allocate, you need to check how much RAM is being used by your system. You can do that from the task manager. When you are in the task manager, click on the “Performance” tab and click on the “Memory”. Here, you can check the RAM being used by your system and you can get an idea of how much you can spare for Minecraft.
Now that you know how much RAM you need for Minecraft and what you can spare in your system, let us proceed to how you can allocate more RAM. Make sure you follow the steps provided here carefully to allocate the RAM without damaging the game installation.
Using Default Minecraft Launcher
The best part about Minecraft is that you can allocate more RAM by using the default launcher. You won’t even need to install any 3rd party application or plugin to do so. Here’s how you can allocate more RAM to Minecraft via the default launcher:
- Open the Minecraft launcher and switch to the version that you usually play.
- Now, navigate to the top of the window and select the proper release of the game from the list of “Installations”.
- Once you have selected the right version of the game, click on the 3-dot icon on the right to access more options.
- Now, select the “Edit” option from the additional options. This will open a new window with many additional settings.
- Here, select “More Options” and scroll down until you find the “JVM Arguments” field.
- Now, you have to make a small change in the field. Simply change the “1” in the “-Xmx1G” to the value of RAM you wish to allocate for the game.
- The “1” in the command represents 1 GB of RAM. Therefore, if you wish to allocate 2 GB of RAM to Minecraft, change the command to “-Xmx2G”
- Once you have made the change, simply click on the green “Save” button.
Using ATLauncher
If you are playing Minecraft with a number of creative mods, then you are probably familiar with the ATLauncher. Even though it is not the default launcher designed for Minecraft, it still allows you to make changes to the game files and allocate more RAM right from the launcher.
Here’s how you do it:
- Open ATLauncher and head over to the settings tab from the right panel.
- Now, click on the “Java/Minecraft” tab present at the top of the window.
- Once you do that, you will see some additional options regarding the game. Here, select the “Maximum Memory/RAM” option.
- Now, you can simply adjust the allocated RAM capacity for the game using the directional arrows.
- Alternatively, you can directly input the RAM capacity that you want to allocate for Minecraft. Keep in mind that you will have to input the value in the MB unit.
- Click on “Save” to save the changes. The changes should take effect when you launch the game.
Using Technic Launcher
Technic is also a highly popular Minecraft Launcher which is preferred by mod players. It offers a user-friendly interface that lets you customize a lot of settings before you launch the game. Apart from adding a variety of mods, you can also change the allocated RAM capacity for the game.
Here’s how you can allocate more RAM to Minecraft with Technic launcher:
- Launch the Technic Minecraft launcher and open settings by clicking the little gear icon from the top-left corner.
- Once you are in the settings, you will have to navigate to the “Java Settings” tab.
- Now, you will find a lot of options that relate to the core game engine. Here, you will be able to find a drop-down menu with the “Memory” tag.
- Once you click on that, you will be able to allocate custom RAM capacity for the game.
- Here, you can allocate more than 4 GB of RAM for Minecraft. Keep in mind that you need at least 4 GB of RAM capacity in order to play Minecraft with mods.
- The changes will be saved automatically as you perform them in the Technic launcher. After you change the memory settings, you can go to the homepage and launch the game and check the results right away.
Using Twitch Launcher
Twitch launcher is yet another popular Minecraft launcher that is famous for its mod support. It allows users to adjust a lot of settings including the RAM allocation without needing any complicated process. It uses simple sliders just like the launchers mentioned above.
Here’s how you can change the allocated RAM capacity via Twitch Minecraft launcher:
- Launch the Twitch launcher and open more settings by clicking on the 3 lines from the top of the window.
- Now, you will be able to access the “Settings” menu. Click on the little gear icon to do that.
- Now, select the “Minecraft” option to access the settings related to the game.
- Scroll down until you find the settings labeled with “Java Settings”. Similar to most other launchers mentioned before, this section includes RAM allocation settings.
- Look for the “Allocated Memory” option in Java Settings. Once you find it, you will be able to change the RAM allocation.
- There should be a slider that lets you adjust the RAM capacity with ease.
- Adjust the slider and make sure that you increase the RAM allotment for the game in order to get more performance.
- The changes are automatically saved in the Twitch launcher.
Using Legacy FeedTheBeast (FTB) Launcher
Lastly, we will talk about the FTB Minecraft launcher. As you might have guessed, it is also a very popular launcher that allows heavy mods in Minecraft. If you are using the FTB launcher, you are in luck as it is the easiest launcher for altering the game settings.
Here’s how to change RAM allocation for Minecraft in FTB launcher:
- Open the FTB Minecraft launcher.
- Go to the “Options” window by clicking on the gear icon present at the top of the window.
- Now, there will be a setting called “RAM Maximum” in the Options window.
- There should be a slider for RAM allotment similar to the launchers mentioned above.
- You can use the slider to adjust the RAM capacity specified for the game.
- Once you make the change, it will be saved automatically.
- You can launch the game right after you make the change and experience the results in performance.

Conclusion
Despite being a comparatively less graphically intensive game, Minecraft is still a heavy game that creates an intensive load on CPU and RAM. And if you are planning to introduce mods to the game, you will have to make sure that your computer can handle that. In most cases, the computers are powerful enough but create problems with the game due to incorrect RAM allocation.
Therefore, we have offered you detailed instructions for a variety of Minecraft launchers and how you can adjust the RAM allocation by yourself. Once you allocate higher RAM capacity for the game, you will be able to enjoy a number of mods with the game which will further enhance your gaming experience.
