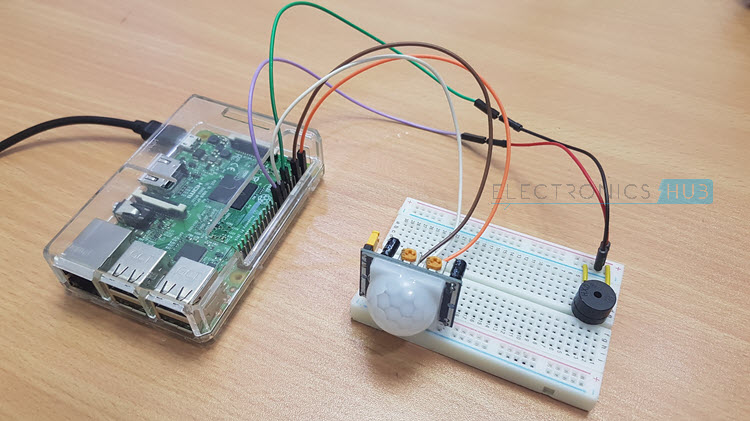
In this project, we will see how to implement a PIR Motion Sensor using Raspberry Pi by learning how to interface a PIR Sensor with Raspberry Pi. In this project, when the PIR Sensor detects any human motion, a buzzer is activated. With this interface, you can implement a simple Motion Detection Alarm as a DIY Project.
Overview
Passive Infrared Sensors, often referred to as PIR Sensors (also IR Motion Sensors and Pyroelectric Sensors), are Motions Detectors that basically detects the changes in Infrared Radiations emitted by a person.
Every living and non-living thing which has a temperature greater than absolute zero will emit infrared radiations. Since the emitted energy is in the form of infrared radiation, whose wavelength is greater than that of our visible light, we humans cannot see those radiations.
But PIR Sensors are built to detect those infrared radiations. Hence, they are employed in a variety of applications like Motion Detectors, Security Systems, Intruder Alert and so forth.
The term “Passive” in the PIR Sensor means that the sensor will not emit any infrared energy but rather detects infrared radiations emitted by other objects. This is in contrast to active sensors, which perform both the actions (emitting and detection).
A Brief Note on the PIR Sensor
The PIR Sensor used in this project consists of a Pyroelectric Infrared Sensor, BISS0001 PIR Motion Detector IC, Fresnel lens and a few other components.
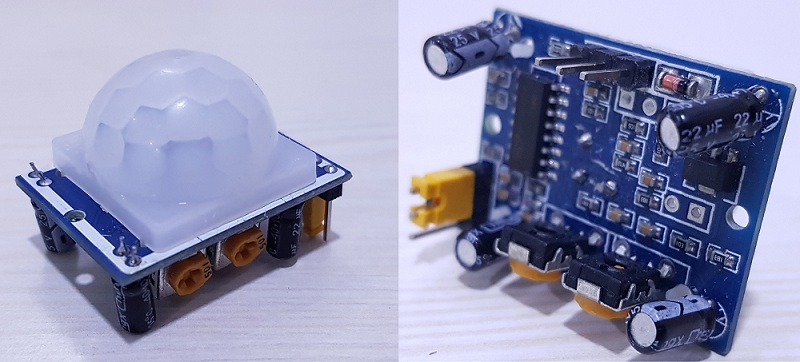
For connections, the PIR Sensor has three pins namely VCC, DATA and GND. Also, the PIR Sensor has two potentiometers: one for adjusting the sensitivity of the sensor (or rather the sensing distance of the sensor) and the other for adjusting the time for which the Output stays high upon detecting any human movement.
The Fresnel lens covering the Pyroelectric Sensor play an important role in focusing the infrared energy onto the sensor. With the help of this lens, the PIR Sensor can detect objects in 1200 angle. The range of the sensor is 8 meters i.e. it can detect human movement up to 8 meters.
PIR Sensor Adjustments
As mentioned earlier, there are two potentiometers for manually adjusting the sensitivity and output timing.
With the help of the first potentiometer, you can adjust the Sensitivity i.e. the Sensing Distance of the PIR Sensor. The range can be adjusted from 3 meters up to 8 meters. To increase the sensing distance, turn the POT in clockwise direction and to decrease, turn it in anti-clockwise direction.
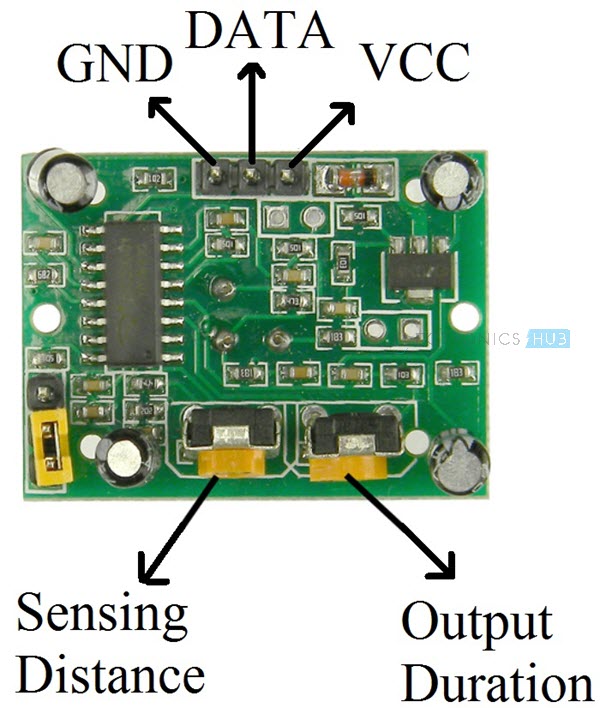
Coming to the second potentiometer, you can adjust the duration for which the Output of the PIR Sensor stays HIGH. It can be varied anywhere between 0.3s to 600s. To increase the time, turn the POT in clockwise direction and in anti-clockwise direction to decrease the time.
PIR Motion Sensor using Raspberry Pi
As mentioned in the introduction, the aim of this project is to interface a PIR Sensor with Raspberry Pi and implement a PIR Motion Sensor using Raspberry Pi and Python Programming.
I have already implemented PIR Motion Sensor Module in several other projects like Automatic Room Lights using Arduino and PIR Sensor, Automatic Door Opener using Arduino and PIR Sensor, Arduino PIR Sensor Tutorial and GSM Based Home Security Alarm System Using Arduino.
The main advantage of the PIR Motion Sensor using Raspberry Pi over all the above mentioned projects is that Raspberry Pi can be easily connected to the Internet and allows IoT based application of the project.
Circuit Diagram
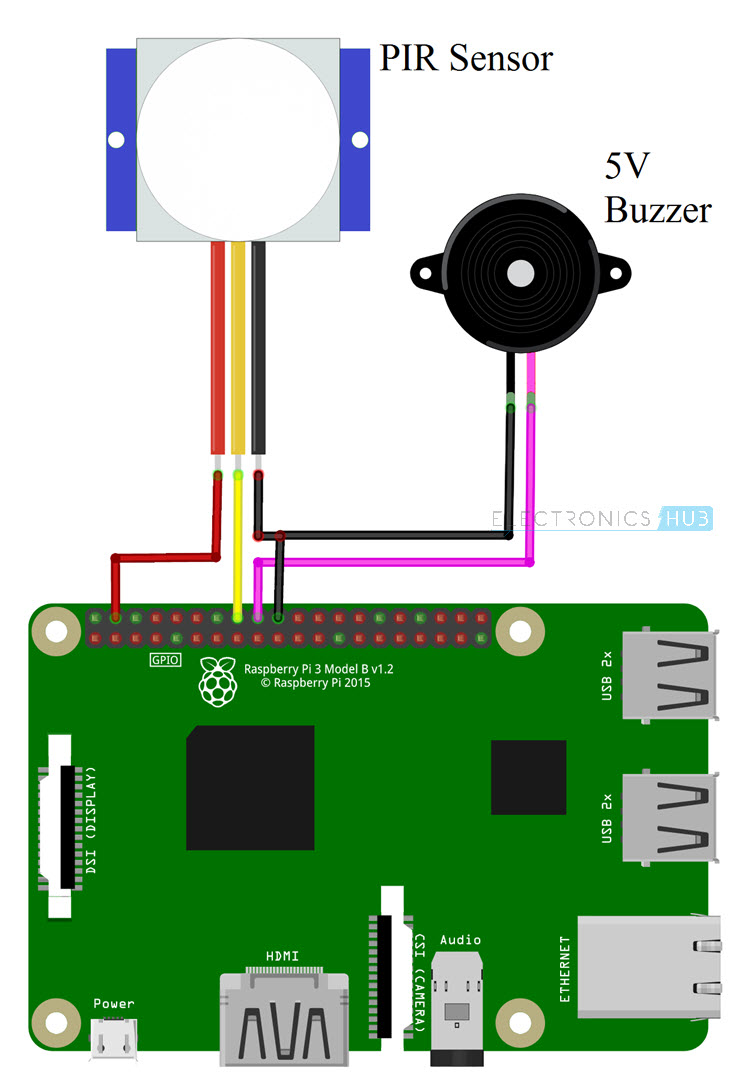
The following Fritzing based images shows all the connections with respect to the PIR Motion Sensor using Raspberry Pi.
Components Required
- Raspberry Pi 3 Model B
- PIR Sensor
- 5V Buzzer
- Connecting Wires
- Mini Breadboard
- Power Supply
- Computer
Circuit Design
Connect the VCC and GND pins of the PIR Motion Sensor to +5V and GND pins of the Raspberry Pi. Connect the DATA Pin of the PIR Sensor to GPIO23 i.e. Physical Pin 16 of the Raspberry Pi.
A 5V Buzzer is connected to GPIO24 i.e. Physical Pin 18 of the Raspberry Pi. The other pin of the buzzer is connected to GND.
NOTE:
- I have directly connected the Buzzer to Raspberry Pi. But if you are not sure, connect it through an NPN Transistor.
- From the previous Raspberry Pi Projects, you already know that Raspberry Pi Input pins are 3.3V tolerant i.e. they work on 3.3V Logic.
- If you are wondering why I connected the output Data pin of the PIR Sensor directly to the Raspberry Pi, then you need to be confused as I have checked the output levels of the PIR Sensor on HIGH state and got a result of around 3.5V.
- You can also check for the same and then proceed with a level converter circuit (voltage divider) if it is required.
Code
The Programming part of the project is implemented using Python. The following is the Python Script for the PIR Motion Sensor using Raspberry Pi.
Working
The working of the PIR Motion Sensor using Raspberry Pi is very simple. If the PIR Sensor detects any human movement, it raises its Data Pin to HIGH.
Raspberry Pi upon detecting a HIGH on the corresponding input pin, will activate the Buzzer.
Applications
The applications of the PIR Motion Sensor using Raspberry Pi project have already been mentioned. Some of them are:
- Automatic Room Light
- Motion Detection
- Intruder Alert
- Automatic Door Opening
- Home Security System
